
Woodworking matters. It’s more than a pastime; it’s a way to leave a legacy.” — Roy Underhill.
A beautifully refinished piece of furniture can breathe new life into any space. Whether it’s a cherished family heirloom, a flea market find, or a dated cabinet that needs a refresh, refinishing wood furniture is a blend of skill, patience, and the right techniques.
Some do it themselves. Others turn to professional wood refinishing services. Either way, the goal is the same—a smooth, durable, and flawless finish. But how do you get there? Let’s walk through the best wood refinishing techniques, from prep work to final coats.
Step 1: Assess the Furniture Before You Start
Not all wood furniture is worth refinishing. Before you begin, ask yourself:
- Is it solid wood or veneer? Solid wood is ideal for refinishing. Veneer can be tricky and may require extra care.
- Is the structure sound? Wobbly legs or cracked frames should be repaired before refinishing.
- What type of wood is it? Some woods, like oak and walnut, take stains beautifully, while softer woods like pine absorb unevenly.
If the piece has sentimental value or is made of high-quality wood, refinishing is worth the effort. If it’s particleboard with a wood laminate? You may want to reconsider.
Step 2: Stripping and Sanding—The Foundation of a Perfect Finish
A flawless finish starts with a clean surface. Here’s how to prepare your furniture:
Stripping the Old Finish
If your furniture has an existing coat of paint or varnish, it needs to go. Chemical strippers are the most efficient way to remove old finishes. Choose a low-odor, biodegradable stripper if working indoors. After applying, use a plastic scraper to remove the loosened layers.
For detailed areas or carvings, a steel wool pad works well. Once stripped, clean the surface with mineral spirits to remove residue.
Sanding for Smoothness
Sanding evens out imperfections and preps the wood for staining. Start with a coarse grit (80-100) to remove excess finish, then work your way up to a fine grit (220) for a silky-smooth surface.
Pro tip: Always sand in the direction of the wood grain to avoid scratches that will show through the stain.
Step 3: Choosing the Best Wood Stain for Your Project
The right wood stain enhances natural grain patterns and adds warmth. But not all stains are created equal.
- Oil-based stains: Provide deep, rich color and take longer to dry, allowing for better absorption.
- Water-based stains: Dry quickly and are lower in VOCs, making them an eco-friendly option.
- Gel stains: Great for vertical surfaces, as they don’t drip as much as liquid stains.
To ensure an even tone, always test the stain on a hidden area before applying it to the whole piece.
Step 4: Applying the Stain Like a Pro
Staining isn’t just about brushing it on and calling it a day. The method matters.
- Use a lint-free cloth or a natural bristle brush to apply the stain.
- Work in sections, applying the stain with the grain.
- Wipe off excess stain within 5-10 minutes—waiting too long can lead to uneven absorption.
- Let it dry completely before adding another coat (if needed).
If you’re going for a darker finish, layer the stain in thin coats rather than applying one thick coat.
Step 5: Sealing the Wood for Long-Lasting Protection
A great finish isn’t just about looks—it needs durability. A clear protective sealant prevents moisture damage, scratches, and fading.
Popular sealants include:
- Polyurethane: The most durable option, available in matte, satin, and gloss finishes.
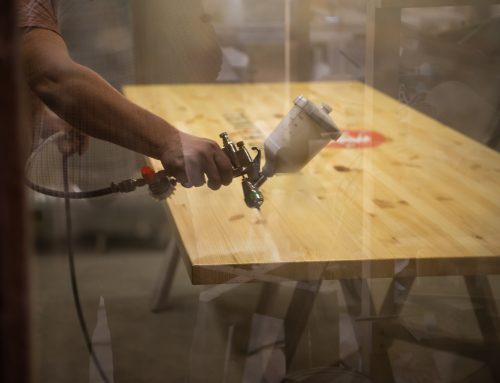
- Lacquer: Provides a deep, rich look but requires spray application.
- Wax: Offers a softer, hand-rubbed finish but requires reapplication over time.
Apply sealant with a high-quality brush or spray gun for an even coat. Allow proper drying time between layers for the best results.
DIY vs. Professional Wood Refinishing—When to Call an Expert
Some pieces are perfect for DIY furniture refinishing, while others require professional wood refinishing. If you’re dealing with:
- Antiques with delicate carvings
- Severely damaged wood with cracks and deep scratches
- High-end furniture that needs a flawless finish
It’s best to hire an expert. A professional refinisher can ensure the wood’s integrity is preserved while achieving a showroom-quality finish.
Why Creative Coatings is Your Best Choice for Furniture Restoration
For over 21 years, Creative Coatings has been restoring and refinishing furniture in Berthoud, Colorado. Our team specializes in:
- Custom wood refinishing techniques tailored to each project
- Sanding and staining furniture with precision
- Expert furniture restoration to bring antiques and modern pieces back to life
From selecting the best wood stain to achieving a smooth, professional finish, we take care of every detail. Call Bryan at (970) 344-5023 to discuss your project today.
When done right, refinishing wood furniture isn’t just a project—it’s an art. Let’s make your next piece a masterpiece.


